Plant Management
On this page, we describe the annual tasks tending the vines and maintaining the structure that supports them. We cover
Pruning: cutting back last year’s shoots
Grafting: adding new cane buds (possibly from a different varietal)
Trellis Management: maintaining the structure that holds up the vines
Shoot Management: managing the individual shoots
Cluster Thinning: thinning out unwanted berry-clusters
We conclude this page with a note about Data Management.
Pruning
Pruning is about cutting back last year’s canes to one or two buds where we expect new shoots to grow in the current season.
Since 2014 we prune in two steps – before we pruned in one. In the first round, in February, we cut last year’s canes down to 6-inch stubs. In March, we cut the remaining stubs leaving a 2-bud spur on nodes around 6 inches apart. In both rounds, after cutting each row, we paint all cuts with a solution of Topsin M WSB (Thiophanate-Methyl Fungicide, EPA No. 73545-16-70506) by United Phosphorus to prevent infection with Eutypa. Following the second round, we spray the entire vineyard with Rally 60W to further protect against Eutypa. In 2015 we started using a new protectant Vitiseal Safecoat (by Vitisal International LLC, http://www.vitiseal.com/Home.html ), which proved to be more effective than the Topsin / Rally combination; it claims to not only seal but also fight Eutypa and other wood diseases and cankers. Rain spreads the Eutypa and canker spores which infect the cutting wounds. The two steps allow starting pruning early, beginning of February, while it still rains. Infections don’t invade the wood more than 1 inch per month; thus, any new disease can be safely cut off in round two in late March. The following pictures illustrate the before and after step 1 and step 2.

We learned about the hazards of Eutypa the hard way. In 2008 & 2009, we decided to prune the vines back more than before, but we did not know about the danger of Eutypa infections when leaving significant cuts exposed without protection. As a consequence, practically every vine got infected. It took over six years to detect and cut out the bulk of the infected arms, and we lost over 60% of the fruit-bearing potential in 2010-2015 until new growth replaced what needed to be cut out. The following graphic illustrates the extent of the damage done by early 2013; it shows the percentage of Eutypa infected cordons cut out and replantings due to gopher and Eutypa damage. We continue to have to cut out infected cordons.

We use electric pruning shears (Electrocoup F3010 by Infaco, link to current model F3015) to make cleaner cuts and are less fatiguing than hand clippers. On completion, we chip all cutoff material into mulch for ground cover.

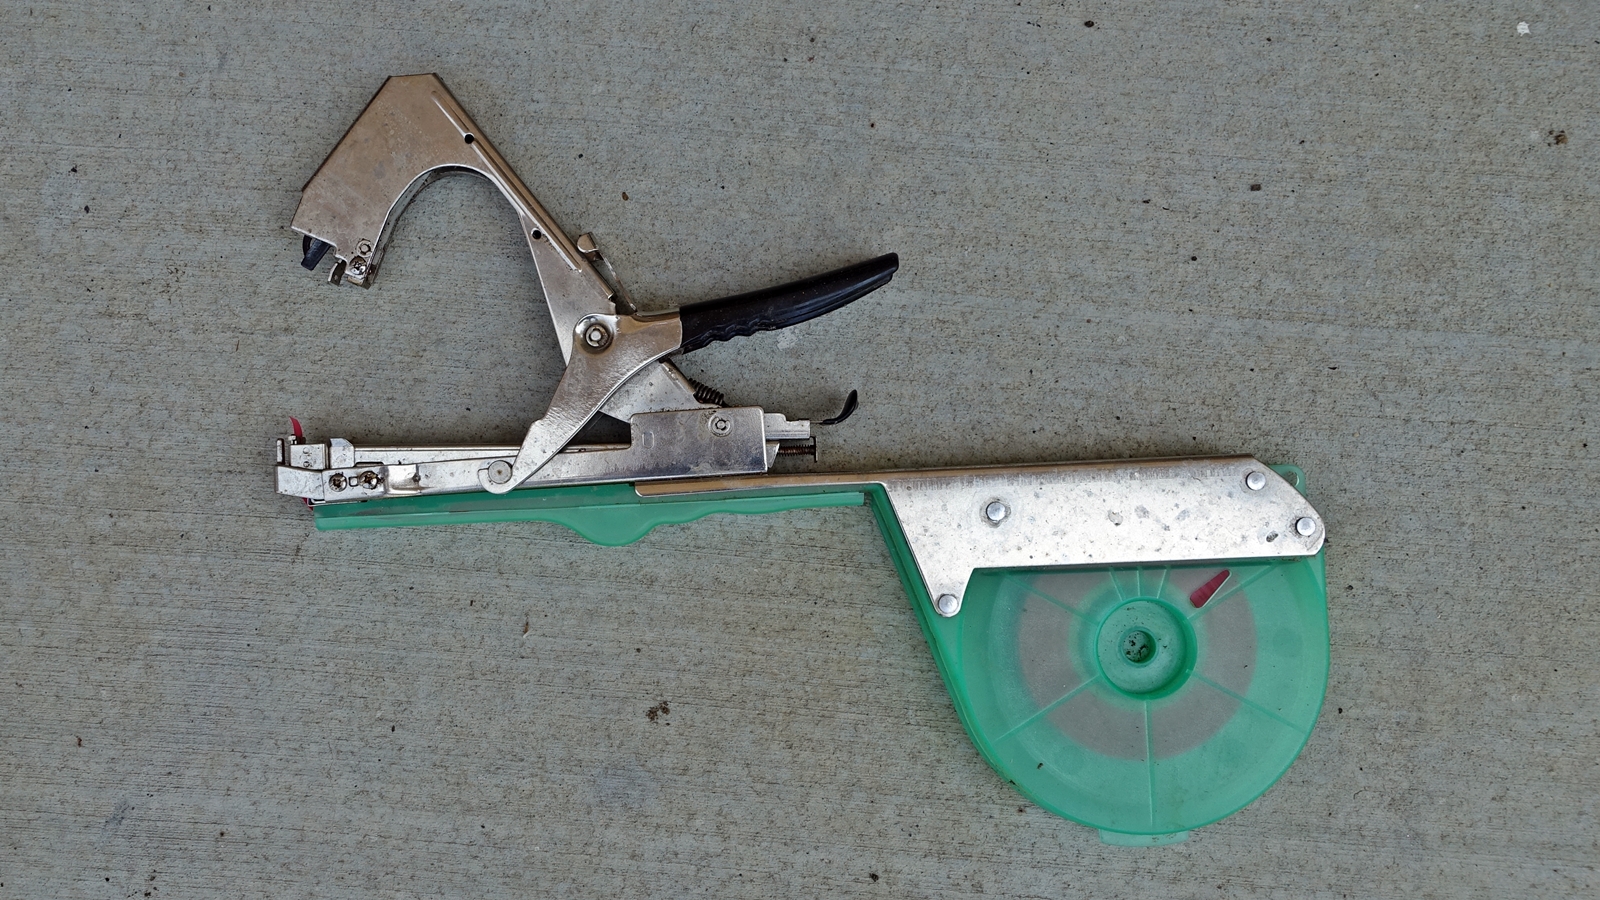
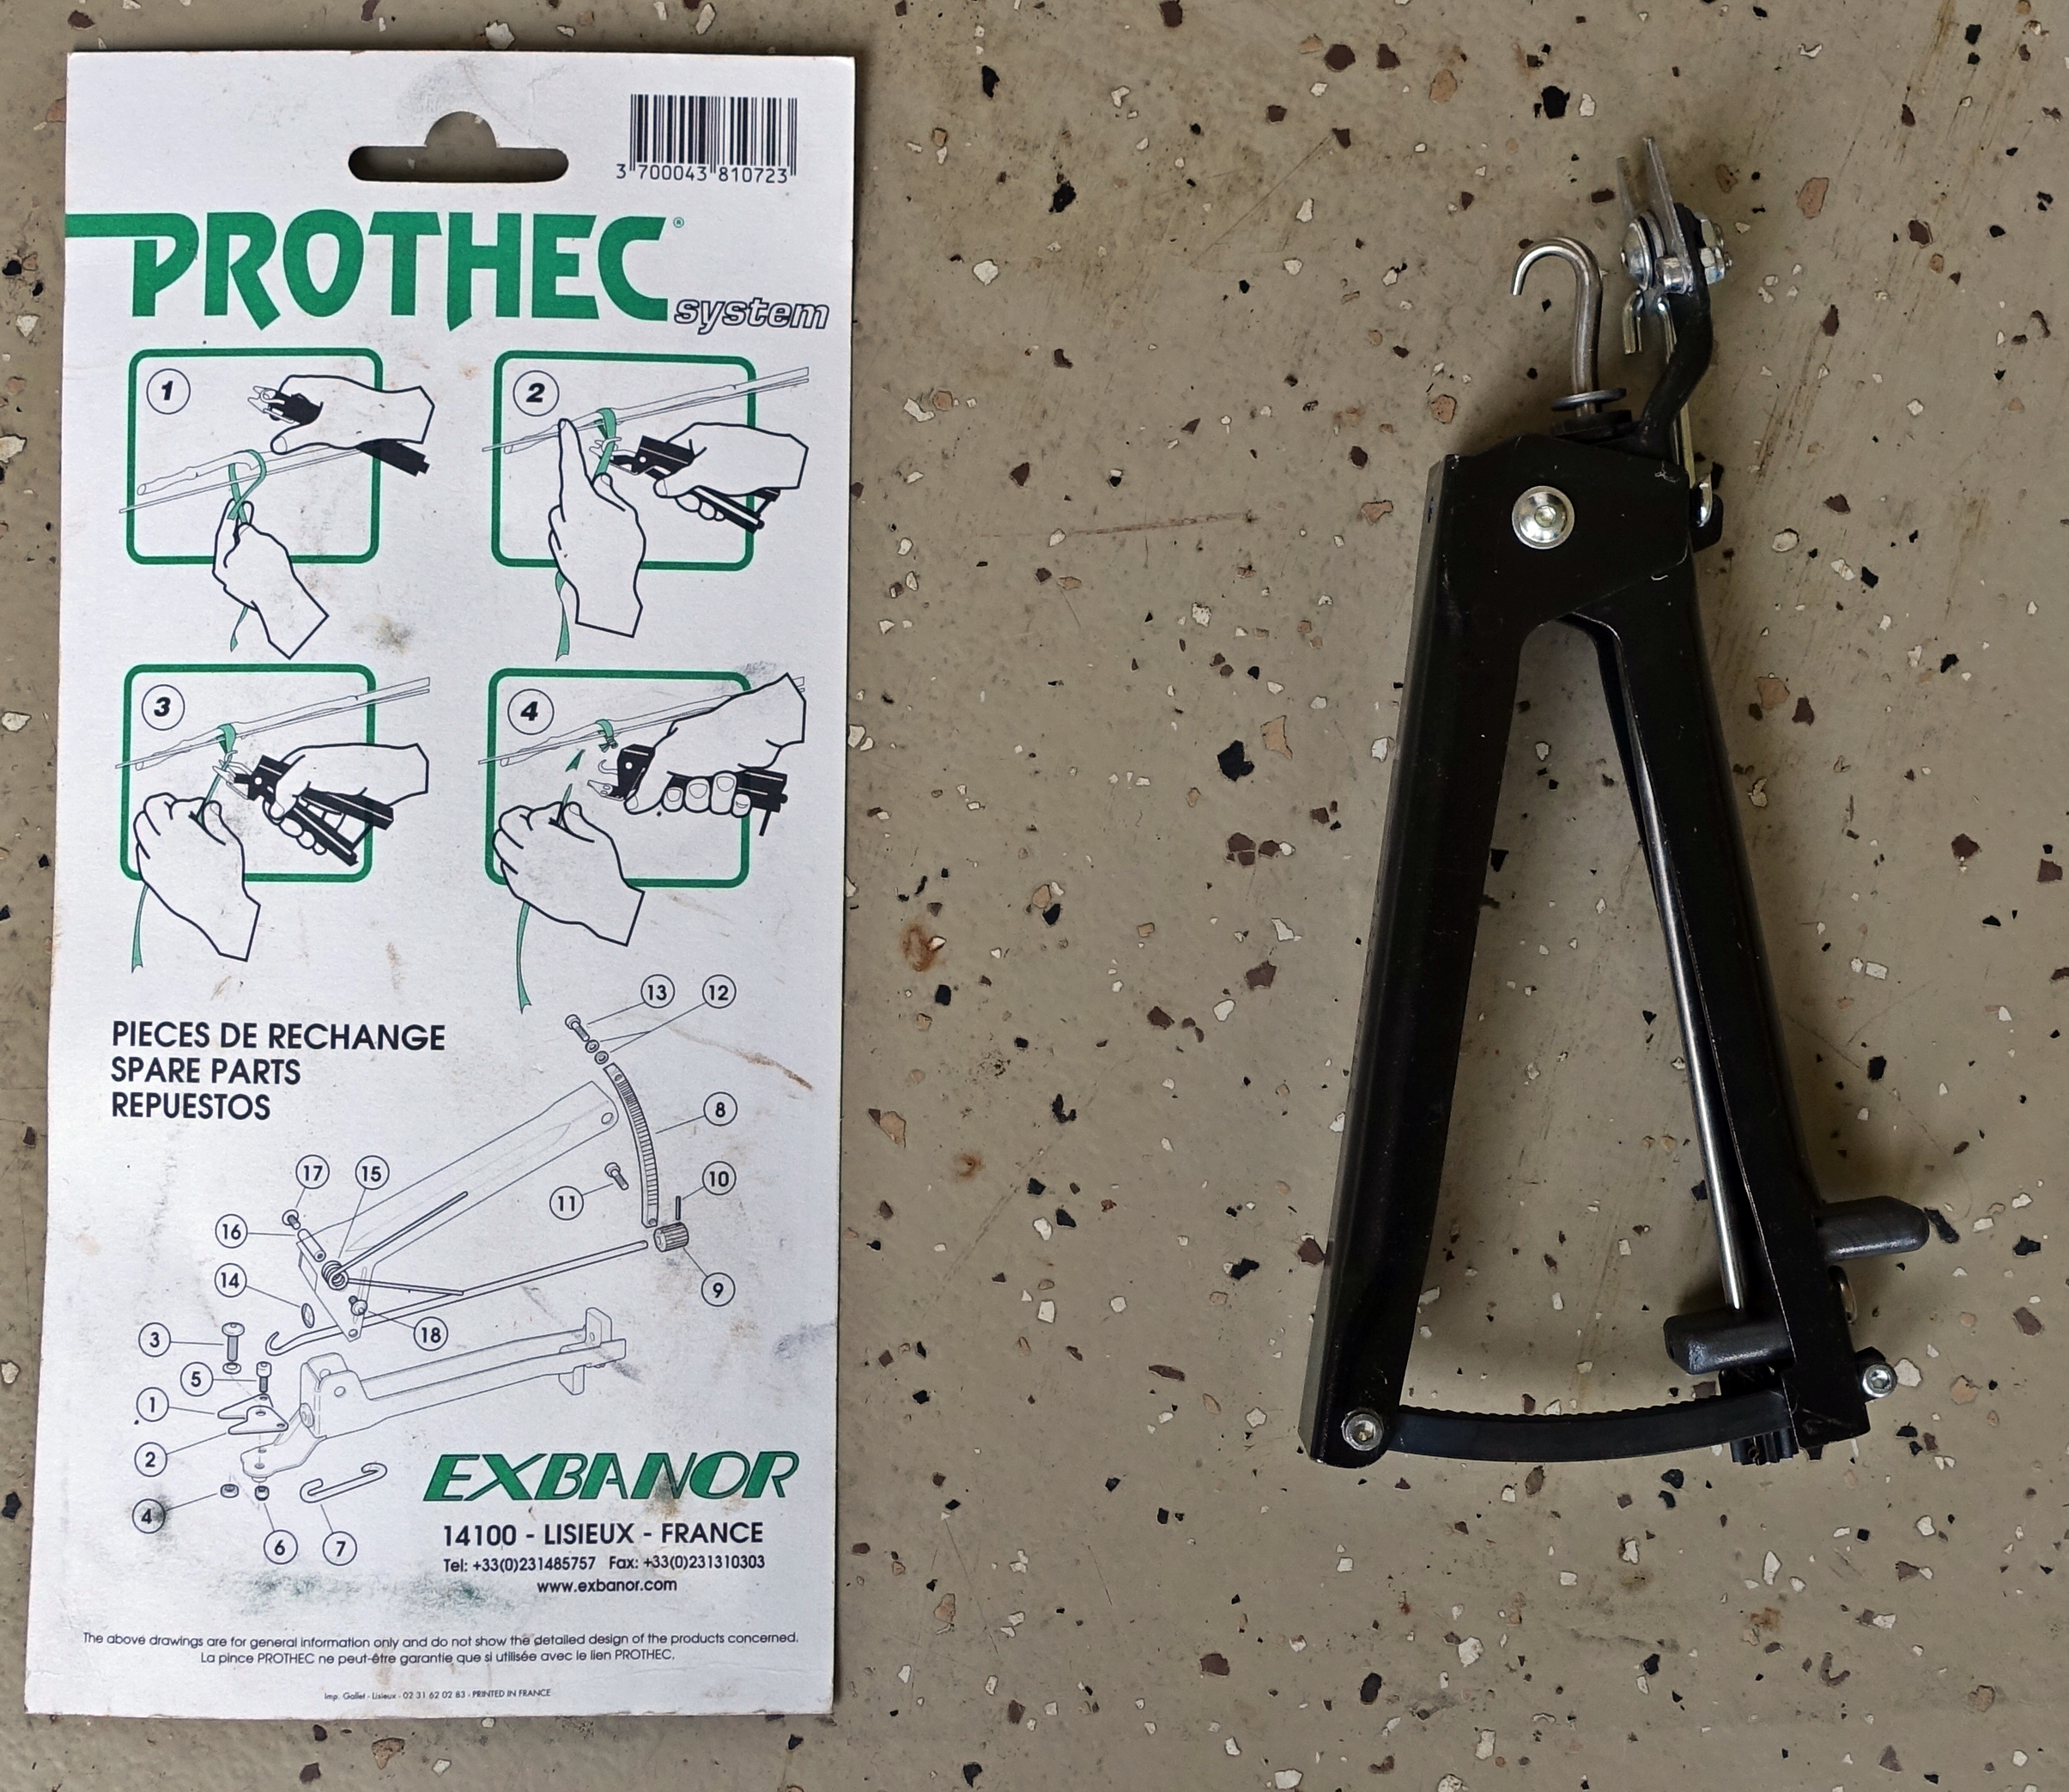
After pruning, we reattach the arms to the guidewires. We used a battery-powered tying machine (A3M v2.0 by Infaco) for very loose ties of young arms in the past, but the metal wire turned out to be more harmful than beneficial. Now, we tie the arms with a plastic tie by hand or with one of the two tie-tools pictured on the right.
Grafting
Grafting is about inserting a dormant bud into a cut on a live vine during late winter / early spring. The bud is encouraged to connect and grow into a new cane by pruning off the stem of the live vine just above the inserted bud. The primary purpose of grafting is to switch the clone or varietal of the vine.
We have not done any grafting yet, so no further info.
Trellis Management
We deployed two different trellis systems: quadrilateral for the lower vineyard and bilateral for the upper vineyard. We started with over-the-canopy nets deployed at Veraison and removed after harvest. Because they are a pain to put on and take off, we replaced them with permanently installed side-nets in 2016-2019. The trellis also carries irrigation hoses. So, altogether it’s a complex system of poles, wires, hoses, and nets that takes a fair amount of upkeep. The maintenance is best performed after pruning when the vines are compact without shoots and the ground is still soft.
Shoot Management
Shoot Management is very labor-intensive and covers a multitude of tasks:
Shoot Thinning: eliminating excess new shoots
Cane Positioning: positioning shoots vertically between trellis wires without crossing each other
Lateral Removal: removing secondary shoots which crowd the canopy
Leaf Thinning: removing leaves in the fruit zone
Hedging: limiting the length of shoots to 3-4 feet.
The goal of shoot management is an even and airy canopy with evenly distributed grape clusters, each getting approximately the same exposure to the sun. Proper airflow limits mildew infections, uniform sun exposure helps all fruit to mature at around the same day (harvest day)
Shoot ThinningOur vines have vigorous growth due to the choice of rootstock, the climate, and soil fertility. The advantages are that the plants can recover well from diseases and the many shoots provide more options for positioning. The disadvantage is that the vines need a lot of spring thinning and pruning because they produce far too many new shoots every year.
We start to shoot thinning in late April when the most extended new shoots are up to one foot long. We eliminate all new shoots which are not positioned well or are deemed excessive for the ultimate density of grape bunches desired. On average, we eliminate around 50% of all shoots. Our general thinning rules are:
Every spur, cut to 2 buds earlier, should have only two new shoots. We often see three or even more shoots.
We eliminate new shoots emerging between spurs only if they fill a gap or are at a base of a spur that we may want to replace next year.
It takes less time when thinning is started early, and excess buds can be snapped off quickly. The longer you wait to thin, the more labor-intensive it becomes.

May is also the perfect time to inspect the vine for Eutypa or “dead-arm disease.” The symptom to look for is stunted shoot growth with small yellowing leaves. Eutypa is a fungus that attacks the wood of the vine and ultimately kills the plant. Early detection and removal of the infected wood are essential if you want to save a plant. For more detail, see this webpage: http://www.extension.org/pages/31525/eutypa-dieback-or-dead-arm-of-grapes. We had a lot of Eutypa in 2009-11 after we pruned the vines too aggressively without protecting the open cuts. After every cut, we now paint the open wound with a solution of VitiSeal which protects the wound (defensive) and supposedly fights the already established fungi (offensive). The following pics show a typical progression of cutting out Eutypa
Cane Positioning
Cane positioning is about putting all canes between the guide wires to point up vertically and not cross each other. We usually start in mid-May when the shoots have reached an average length of ~2 feet. Ideally, we position before bloom so that the flowers don’t get disturbed by the abrupt movements and develop successfully into berries. The purpose of cane positioning is threefold:
first to create an airy canopy, so infections by powdery mildew are less likely, and spraying is more effective;
second to give all bunches approximately equal exposure to sun and shade, so the grapes develop more evenly; and
third to manage and equalize the length of each cane, again to manage balanced maturing of the grapes.
We put the canes between the bottom guide wires, which are then held together with C-clips.
As the canes grow, more rounds of positioning are required over the next six weeks to do the same with the middle and the top guide wires.
Lateral Removal & Leaf Thinning

We need to contain vegetative growth and channel energy into producing optimal grapes. Earlier in the year, we contained the canopy by eliminating surplus shoots. Now we need to contain the growth on the canes we decided to leave standing. Ideally, they will grow and carry 2-3 bunches of grapes and 10-12 leaves to support them. Because of the excessive vigor, many canes will grow additional “lateral” canes at each leaf joint – and if not removed, each of these lateral canes would, in turn, grow to carry second-tier bunches and leaves. So we need to pinch off all laterals at each leaf joint before they get big. Doing so opens up the canopy for air circulation (which helps prevent mildew), and it forces the vines to channel their energy to the primary grape clusters.
While eliminating laterals, we continue with positioning the canes between the upper two guide wires. We also remove the first 2-3 leaves on each cane (up to and including the leaf opposite the lower bunch) to expose the grape bunches to direct sunlight. It promotes tannin development and prevents leaves from getting tangled into bunches. The pictures on the right show a typical “before and after” on a single vine.
We start hedging when 50% of the canes have grown more than 2 feet beyond the top guidewire. Lateral removal is critical for effective hedging. If laterals had not been removed before, a topped cane would accelerate the growth of the laterals at each leaf node, and these laterals would grow secondary grape bunches. The consequence would be a very dense canopy with grapes of uneven maturity.
We start lateral removal and leaf thinning around mid-May during full bloom. It is very labor-intensive, taking me about 100 hours for the entire vineyard in two rounds. Hedging is a continuing effort because shorter canes continue to grow, passing the ones we topped earlier.
Grape & Cane Thinning
The goal of grape thinning is to optimize the quality of grape bunches that the vines should be capable of bringing to full maturity. The final quality depends on the current state of the bunches and the capacity of the vines to mature them fully. Soil nutrition and the weather, year to date, define the volume and quality of bunches available now; the age of the vines and the arms establishes the number of grapes the vine can expect to fully mature, assuming average weather patterns for the remainder of the year.
Our target is to harvest 1.2 tons of grapes for our wine production and sell the remaining crop to a local winery. We estimate that in a great season with mature, healthy vines throughout, the vineyard should be able to produce about 2 tons, or 2.7 tons/acre, of high-quality grapes. In an average year, we are happy with a harvest of 1.2 to 1.6 tons/acre. Eye-balling the current crop load and comparing that estimate to the target significantly influences how aggressive we are at dropping bunches at this time.
Our general rules for dropping bunches and canes are:

We drop bunches which have reduced or mediocre fruit set (i.e., not well developed or damaged fruit)
We drop all bunches on canes that are now less than 1 foot long (i.e., the cane would not have the capacity to mature the fruit). We also cut out the weaker of two canes on a node if either of them is less than a foot long (the idea is to focus the vine’s energy on growing what is needed next year).
We drop all bunches except the best developed on canes which are now between 1 and 2 feet long (i.e., the cane would not be able to mature more than one bunch)
We drop all bunches except the two best developed on canes which are now over 2 feet long, except for extremely strong canes, which are allowed to carry a max of 3 bunches if those bunches are well separated in space.
We cut off pronounced wings on all remaining bunches (berries on wings tend to mature later rest of bunch)
These rules have room for interpretation. The interpretation depends on how much tonnage we want to drop.
The picture illustrates the health of the vineyard in early June 2013. It shows the average lengths of the canes for each side of each plant. Clearly, the short canes are primarily on the young vines (which were replanted a few years ago due to gopher damage) or on the new arms (which grew to replace the Eutypa cut-outs)
Cluster Thinning

At Veraison, the grape berries turn from green to purple-blue as anthocyanins replace chlorophyll. This turning of color provides an excellent opportunity to compare the maturity of the grapes across the vineyard. Ideally, Veraison should happen for all grapes simultaneously, but it does not – some turn color early, others turn color late. Because we will pick the matured grapes all at the same time, we end up picking grapes at different levels of maturity. To narrow the range of final maturity at picking time, it is advisable to drop the first 5-10% of bunches that have turned color and drop the last 5-10% of bunches a couple of weeks later that are still green. Doing so should narrow the range of grape maturity left on the vine. This assumes that the early birds would not slow down their development, and the late bloomers would not accelerate their maturing and catch up.
The following graphics show the progression of Veraison in the vineyard from July 21 to August 4, 2013. On July 20, only 1% of berries show blue coloring. By July 26, that percentage increased to 20%. By July 30, 60% of berries have turned, and by August 4, the level of Veraison has reached 86% on average

Note that the development is uneven: the short rows and the east side of row 1 lag behind in development for about five days. One potential remedy for next year is to start pruning the short rows first, before long rows (in 2013, we pruned from south to north).
The graphic on the left shows how Veraison progressed in 2013. The mid-point at 50% Veraison happened around July 29

With veraison 90% complete, we start cutting out the remaining green grapes – green thinning so as get more even maturity for the remaining grapes at harvest time. The general rule is to cut out all bunches which at this point show no sign of veraison. The following graphic shows the crop load on each vine after grape thinning. The loads are graded 0 (for no grapes on the vine) to 8 (full grape load).
Interesting article on crop thinning and overcropping:
http://www.enologyinternational.com/yield/yieldvsq3.html
Data Management
We record all plant management tasks in the database through the “INPUT: VineyardActions” – Layout. Other than the date of the activity and the time it took to complete, we record no data except occasional commentaries. These tasks do not lend themselves to a lot of measurements. Here is a screenshot of the layout recording cluster thinning for August 20, 2018, in the short rows of the lower vineyard. Upon entry, the layout shows aggregate person-hours spent on the vineyard blocks and for the task type.

Previous page: Soil & Vineyard Floor Management
Top of page: Go
Next Page: Nutrition Management
Last updated: May 2, 2021